Friday, 12 October 2012

Mom's Tortellini Bake

This is one of my all time favorite recipes. My mom made it all the time when I was growing up and now that I'm a grown up I make it all the time. It's the best comfort food. Even just thinking about it makes me feel all warm and cozy inside.
Not many pictures this time as I only thought about blogging it after the fact. But whatever, the end product is the best picture anyway.

What you'll need:

One package tortellini (I usually get the 3 pack of multicolored tortellini from Costco and just use one package, sorry not exactly sure of the size).
One large onion, or two small, diced fine (I like to use red and white onions)
Milk
Flour
Butter
Olive Oil
Parmesan Cheese
Cottage Cheese (500 mL tub)
Mozzarella Cheese
Frozen Peas, about a cup (I usually don't include them because my husband doesn't like them but my mom always does)
1/2 tsp Salt
1 tsp Pepper
2 tsp Oregano
Bread Crumbs
More Butter

First, preheat your oven to 350F. Chop up your onion(s) and saute them in a pan on medium heat with about 1/2 cup butter and 1/2 cup oil until soft. Once the onions are translucent, add your flour. About a third of a cup but you can test for yourself. Basically you're making a roux with onions in it so whatever consistency you like it. I don't make it  very thick as you will be adding lots of cheese later and that makes the sauce thicker. Once you've added the flour and stirred it around, add your milk, 1 to 2 cups. I'm really guessing on the measurements here because I just make it by sight and as I didn't take any pictures, (never making that mistake again) it's a little bit hard for me to explain. Anyway, add your milk and get the cottage cheese in there right away too. Mix that together then add your Parmesan and Mozzarella cheese as well as your spices (salt, pepper, oregano). Also add your peas and let that simmer for a little bit and just keep it warm if your tortellini isn't fully cooked. Oh, I forgot to mention, while you're making your sauce, get your water boiling for your tortellini. Cook the tortellini according to package directions and once they're all done, drain the water and pour them into a greased baking dish. The one I use is probably 12x12 square. A 9x13 would work well too. Okay, get the tortellini in there then pour your sauce over top. Next, make your breadcrumbs. I use about a quarter cup of butter, melted, and then just add breadcrumbs until it has the consistency of wet sand, maybe a cup? Probably more. Yeah, probably closer to a cup and a half to two cups because you need to cover the whole dish. I used Panko breadcrumbs for this batch and just added my own spices (pepper, oregano, basil, salt) and they worked really nicely. I have used Italian breadcrumbs before and that's even easier because the spices are all there for you. Anyway, once your breadcrumbs are the right consistency, sprinkle them in a good layer over the top of the tortellini. Stick it in the oven and bake for about 30 mins, or until the edges are bubbling and the breadcrumbs are a nice golden brown.


Now that I'm looking at the picture I definitely added some of that lovely dried Italian parsley I have. So there's something else you can add.

The best. Also, I love my white dishes.


And there it is. Hope you're all staying warm and cozy with the people you love most. I'm going to spend the rest of my evening on the couch with my favorite person and a huge glass of egg nog. That stuff rocks my world.

xoxo

A

Sunday, 30 September 2012

Rollkuchen

Alright, before we get down to business, I must apologize. School and, well, school, have kept me very busy the last few weeks and I have not been able to blog as much as I would like. To all of my faithful followers, I am sorry. Please be patient with me as I am in the home stretch of finishing my degree! I have a good months worth of pictures from my kitchen and they will all make it here eventually.

Alright, enough of that...

Any good Mennonite like myself has grown up eating Rollkuchen and watermelon in the summers. It's one of those things that just has to happen and no summer is complete without it. My dad makes amazing Rollkuchen so I said to him, "Dad, let's make Rollkuchen together one day this summer so I can blog about it." Wouldn't you know it, a few weeks later we were doing just that. Now, the recipe for these Rollkuchen is a closely guarded secret in my family so alas, I will not be sharing the recipe. I will share the process and the fun that was had making these wonderful pieces of fried dough however.

First off, it is very important to sift all of the dry ingredients together so they are evenly disbursed and probably for other reasons which I don't know.
Once the dry ingredients were sifted, we added the wet ingredients and started mixing our dough.
There I am mixing it all up in my parent's kitchen. Eventually my dad took over as he knows how the dough is supposed to feel in your hands.
There's my dad kneading dough like a boss.
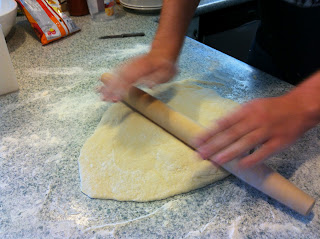
Once the dough is the right texture, it's my brother's job to roll it out to just the right thickness (yes, it's a family effort).
While my bro is rolling out the dough, my dad starts heating up his deep fryer. As that's heating up, my brother and I finished rolling out the dough and started cutting it into strips.
The first batch of dough ready to be fried.
I took them out to my dad (he has his deep fryer set up in the garage so the whole house doesn't smell like a fast food restaurant) and he carefully puts the strips of dough into the preheated oil.
There they are, all happy and frying away. Once the edges start to turn golden brown, that's when they're ready to be flipped.

First batch done and the next batch waiting in the wings.
And done. Look at those things. Just look at them. Golden pillows of airy, fried goodness. It's good to be a Mennonite. Be jealous.
Of course, you can't eat Rollkuchen without watermelon. It's a law of nature. Or something.
You also can't forget the brown sugar sauce. It's liquid crack. For real. The trick is to kind of squish the rollkuchen into the sauce so it gets in all the little air pockets on the inside. Double dipping is also allowed. In hindsight, this afternoon was a highlight of my summer. I think we have a new family tradition??

And that's it for today's blog entry. I promise I will share an actual recipe next time, I just had to blog about rollkuchen. It's in my blood.

xoxo

A


Sunday, 9 September 2012

Strawberry Greek Yogurt Cake

And here is part 2 of my Sunday adventure in the kitchen. This recipe I cannot take credit for. I found it on Pinterest and here is the link: http://aspicyperspective.com/2010/05/farmstand-fresh.html
Oh. My. Word. This cake is reedonkulous. Seriously. I don't throw around made up adjectives willy-nilly so you know I'm being serious. And oh my was it easy! I'm not going to go into crazy detail with this one as you can follow the recipe exactly by using the URL above.
I mixed all of the dry and wet ingredients as instructed and I ended up with a fairly thick batter. The next time I make this cake I am going to use a slightly thinner Greek yogurt as I didn't end up with the "strawberry tears" that the author of the blog I got the recipe from referred to.
My cute little strawberries all dusted with flour.
Strawberries mixed into the cake batter. Make sure to ever so lightly fold the strawberries into the cake batter as you don't want to crush the strawberries.
I don't remember where exactly I learned this but as far as I know it's very important to grease your bundt pan very well. Maybe that's because of it's shape? Anyway, I did exactly that.
There she is all smoothed out and ready to go in the oven (yes, this cake is a female. Obviously).
And here she is after spending some quality time in the oven. I love that golden brown colour. I think I'll paint my whole house that colour.
Skip to cake completely cooled and iced. Since this cake was so large I wanted to take it and share it with my family but my husband had a greedy moment and would not let her leave the house. That must mean it was good.

Also, I realized this weekend that I actually have some fans!! I'm shameless when mentioning my blog to my friends/family. When I started talking about it to a couple of my girlfriends this weekend one finished naming it before I could and said "I'm on there all the time!" Well, hmm. That's great! I'm glad I have some faithful readers! As such, I will try and blog a little bit more for my faithful following.

xoxo

- A


BBQ Ribs, cheesy, garlic Mashed potatoes, Corn on the Cob 

Sundays are probably my favorite days to cook a huge meal. I try not to plan much on Sundays, usually because I reserve those for my cooking days in which I take my time and make up my own recipes. Sigh, I just love Sundays. Also, if I make a big meal on a Sunday I will ALWAYS make a dessert (which I will focus on in my next post).
On this particular Sunday I wanted to make a good old fashioned barbecued dinner. Ribs, crazy good mashed potatoes and corn on the cob (also done on the bbq). Not much better than that. These recipes today are all courtesy of yours truly! Sundays really are the best. So here goes...

BBQ Ribs

Approx 2 full racks of ribs (I don't know what the weight of the ribs were but they were one of those long racks you can get at Costco that come in a pack of two. They are approximately two "full" racks).
Okay, fine, here's just a picture for reference instead of me just rambling on and on trying to explain to you how big they are.
I made a rub for the ribs consisting of approx:
1/4 cup brown sugar
1/8 cup white sugar
1 T oregano
1 t cumin
1/2 t cayenne pepper
1 t paprika
1 t smoked chipotle powder
1 t black pepper
1/2 t salt
1 t garlic powder
... and I think that's it.
I rubbed that in pretty good so that the meat could have a really nice smoky flavor. I put a little bit of water at the bottom of a 9 x 13 baking dish and baked the ribs at 350 degrees for about an hour.

While those were in the oven I started making my mashed potatoes. I used a whole bag of those small red potatoes with the skins still on. I cut them in half and boiled them until I could poke a fork through them easily.
Aww, how cute. My Grandma would have referred to these as potatoes with their jackets still on.
Anyway, once these were done I added about 1/4 cup of sour cream, 1/2 cup of cheddar cheese, an entire bulb of roasted garlic (cut off the top of the bulb, drizzle with olive oil and bake for 20 mins at about 350 or until the garlic is nice and soft), some salt and pepper, maybe some butter and/or milk? I can't remember exactly as I'm writing this post a few weeks after I made it and I never write my recipes down. The texture was chunky but still moist. Dry mashed potatoes are, just, no.

Once the ribs came out of the oven, we (when I say "we" I'm referring to my husband and I) put them on the bbq and basted the crap out of them with some garlic and onion bbq sauce. They don't go on very long as they're already cooked, just long enough to get a nice char on the outside.

Our corn cobs also went on the bbq and I cannot take credit for that as my husband cooked them and they turned out fabulous.

So this picture looks a little overexposed (is that the right word?) but I think it shows clearly the nice char that was achieved on these ribs. And no, I didn't eat all of that in one sitting. It sure made a tasty lunch for work the next day!

This picture shows the potatoes and the corn a smidge better - as you've probably gathered for yourself. I also love mashed potatoes in any form/texture. These were pretty chunky but I also like them whipped completely smooth or fried into little croquettes (we had potato croquettes for our anniversary dinner and they were AMAAAAAzing).
Okay, and now while I'm on a roll, part two featuring a strawberry greek yogurt bundt cake is up next!

- A


Thursday, 30 August 2012

Strawberry Shortcake

Strawberry Shortcake is by far one of my favorite desserts. What's not to love about a soft, sweet shortcake with whip cream and strawberries all over it? It has been a tradition in my family that every year on my birthday we have strawberry shortcake. I didn't get it this year :( so i decided I would make it myself! A couple friends had half moved back from Montreal this summer (half as in she has moved back and he has yet to make the transition back to the Prairies) and they were coming over for a dinner party so why not make something special for them? I made an entire dinner but as I already featured one of those recipes in my last blog post I figured I would focus on the dessert in this post. Plus one of the recipes, though delicious, I will never make again so I'll just leave that one in the archives.
I got this recipe from my mom as this is normally the shortbread recipe that she uses and I have yet to have a better strawberry shortcake than hers. Mine was equally as good for the record. So here goes:

2 cups all-purpose flour
2 Tbsp granulated sugar
1 Tbsp baking powder
1/2 tsp baking soda
1/4 tsp salt
1/2 cup butter
1/2 cup sour cream
1/4 cup milk

For the glaze: milk and granulated sugar

Combine all of the dry ingredients in a medium bowl. Next, cut in butter finely. Combine the sour cream and milk and then add to the dry ingredients. Stir mixture with a fork until all the ingredients are combined and you have a soft, slightly sticky dough.
Gather the dough onto a floured surface and need until smooth, about 8 times. Roll or pat the dough into either one large round, or 6 individual rounds. I opted for the 6 individual rounds as I wanted to make each person an individual cake. I fear that my dough may have been just a touch too tough as I first patted it out into one large round, realized that was not my plan (I was following the directions a little too carefully), then cut it into 6 pieces and rolled those pieces out again.
I put the cakes on a baking sheet lined with parchment paper and brushed each of them with the milk and sugar glaze.
There they are, all cute and ready to be baked. I had set the oven at 425 degrees and baked them about 15 to 20 minutes or until they looked like this...
Aren't they just adorable? I left them out to cool completely. In the mean time I prepped my whip cream (whipping cream and powdered sugar in a mixer until stiff peaks form) and strawberries (cut up and then mixed with a tiny bit of sugar just before serving). I cut each cake in half and then layered them with the whip cream and strawberries to make this...
Ta-da! What a perfectly delicious looking strawberry shortcake. Pair this with a glass of wine and you have perfection.
Yay for summer!

- A


Monday, 20 August 2012

Parmesan, parmesan, parmesan

Today's recipes are brought to you by Parmesan cheese. And lots of it. I found a recipe for Broiled Tilapia Parmesan and Parmesan and Basil Orzo and thought, well what the heck, let's make those together.

I never used to be a fish/seafood person until a few months ago. I had always considered myself as someone who likes literally all kinds of food but the fact that I didn't like fish went against the schema I have for myself (I said that exact sentence to my mom and she says, "You've read too many Psychology textbooks." I'm a Psychology major, I can't help it).  Anyway, I started buying more fish and cooking it at home - which my husband has been happy about - and now I can't believe that I wasted so many years without this delicious food group! Here's the recipe I found on allrecipes.ca for Broiled Tilapia Parmsean:

  • 1/2 cup Parmesan cheese
  • 1/4 cup butter, softened
  • 3 tablespoons mayonnaise
  • 2 tablespoons fresh lemon juice
  • 1/4 teaspoon dried basil
  • 1/4 teaspoon ground black pepper
  • 1/8 teaspoon onion powder
  • 1/8 teaspoon celery salt
  • 2 pounds tilapia fillets
First, I started preheating my broiler in my oven. That baby sure doesn't take a long time to heat up. I lined a baking sheet with aluminum foil and added a liberal amount of cooking spray. Then I mixed all the ingredients together - except for the fish - in a small bowl.

 It's important that the butter is soft but not completely melted into a liquid. You still want it to be semi solid so you can spread it on the fish easily and it actually stays there.
Now, arrange your fish filets on the baking sheet in a single row, like so...
Broil the filets for 2-3 minutes then flip over and broil the other side for about 2-3 minutes as well. Once both sides have been broiled take the fish out of the oven and cover with the Parmesan mixture and broil for a couple of minutes more. I found that I only needed to broil it for about a minute more, also because it started smoking like crazy.
And there it is. I must say, this was quite a delicious recipe that I will definitely make again. As for my side dish, here's the recipe for Parmesan Basil Orzo that I found off of Pinterest. Here's the link: http://tastykitchen.com/recipes/main-courses/orzo-with-parmesan-and-basil-2/
  • 3 Tablespoons Butter
  • 1-½ cup Orzo
  • 3 cups Chicken Or Vegetable Stock
  • 6 Tablespoons Fresh Chopped Basil
  • 1 cup Parmesan Cheese
  • ½ teaspoons Salt
  • ¼ teaspoons Pepper
First melt the butter in a saucepan. Once melted, add the orzo and saute for a few minutes, until the orzo is a nice golden brown color.
It's a little hard to see in this picture but I'm pretty sure that's what I achieved here. Once you reach this point, add the broth and cook for about 20 minutes or until all the liquid has been absorbed. After that, remove from heat, add the basil and the Parmesan, stir it up and enjoy.
Finished meal. You could also add a salad or vegetable of some sort to help complete this meal. I don't usually make more than two things when it's just my husband and I. Guests are fed better than I feed myself at my house.
That's all for now.

- A


Saturday, 11 August 2012

Lasagna Cupcakes

Daryl, Chantelle - this one's for you guys...

I love lasagna. Really, who doesn't? It's the ultimate good. Also, who doesn't love cupcakes? Seriously. Putting the two together? Ugh, perfection.
This comes from another recipe I found on Pinterest and along with a few twists courtesy of yours truly, this recipe is going into my favorites folder. The genius part of this recipe is that instead of using lasagna noodles and boiling them and trying to make them cupcake size it uses wonton wrappers! Best idea ever.

Here's the link: http://quick-dish.tablespoon.com/2011/03/31/lasagna-cupcakes/?nicam1=content_pcc&nichn1=Outbrain&nipkw1=Lasagna-Cupcakes&niseg1=TBSP_Traffic&nicreatID1=QuickDish

And here we go...

 24 wonton wrappers (uses 2 in each, makes 12 cupcakes)
1/3 pound ground beef
2ish cups grated Parmesan cheese
2ish cups mozzarella cheese
3/4 cup ricotta cheese
1 cup pasta sauce (I used my own recipe here)
Italian parsley (yes I still have lots).

First, you want to preheat your oven to 375 degrees and spray a muffin tin with non-stick cooking spray. Start browning your ground beef and as you do that you can start to put one wonton wrapper in each muffin cup. The recipe said to cut the wonton wrappers into circles but I left them as squares as I thought it would look a little more rustic (the original recipe suggests that as well).

Once you have the first wonton wrappers in the muffin tin, you can start layering. First, add some ricotta, parmesan, and mozzarella. Then add a little bit of ground beef, and tomato sauce on top. Put the second wonton wrapper on top of that.
Add another layer of parmesan, mozzarella and the remaining ricotta. Then beef and sauce again. At the end add the remaining parmesan and mozzarella and top with italian parsley (or herb of your choice).
Once these babies are assembled like so, bake them in the preheated oven for 18-20 mins or once the edges are browned and the cheese is bubbly.
Let the cupcakes cool for about 5 minutes before taking them out of the pan.
It might be illegal for something so cute to also be so tasty.
Attempting to get a picture of the layers on the inside. Needless to say these were super easy and super delicious. Chantelle - we need to see each other again soon so we can make these together like I promised.

I've got so many more delicious demonstrations on the back-burner. Hopefully I'll find time to blog a little more frequently!

- A


***I made this for a second time and used ground turkey instead of ground beef and mixed in some pesto with the ricotta - because pesto makes everything better - and it was even more delicious the second time around***