Monday, 7 January 2013

Tomato Basil Parmesan Soup

Who doesn't love an awesome bowl of awesome soup on a cold, blustery day in winter? Or really, any day for that matter? My husband and I started a tradition of Soup Sunday's a while back and though we don't make soup every Sunday it is probably my favorite day of the week to do so. You have lots of time (usually) to just sit around and let things simmer as opposed to other days that are filled with work/errands/other stuff. I try not to plan too much for Sundays as I reserve those days for family, church, and of course, making soup!

This is another recipe I found on Pinterest and when I did a Google search to try to find the recipe that I used, I found that there really are a million different variations. I looked at a few of them and some of them are pretty much the same but what really appeals to me about this recipe was that it used a slow cooker. And it was so easy and not to mention delicious. It made a large batch as well so my husband and I were eating this soup everyday for lunch that week. So here goes:

Ingredients:
2 (14 oz.) cans diced tomatoes, with juice
1 cup each, finely diced celery, carrots and onions (the Holy Trinity of soup making as I've heard this combination of vegetables referred to before)
1 teaspoon dried Oregano, or 1 Tablespoon fresh Oregano (dried herbs are much more potent than fresh herbs)
4 cups chicken broth (I prefer to use low sodium)
1/2 bay leaf
1/2 cup flour (all purpose is fine)
1 cup Parmesan cheese
1/2 cup butter
1.5-2 cups half and half cream, warmed
1 teaspoon salt
1/4 teaspoon black pepper

Directions:
add tomatoes, celery, carrots, onions, chicken broth, oregano, basil and your bay leaf to a large slow cooker.
Like so. Put the lid on the slow cooker and cook for 5-7 hours on low until vegetables are soft. I think I cooked for 5 hours only and the vegetables were cooked. You can leave the soup in the slow cooker on warm until just before you're ready to serve.
About 45 minutes before serving, prepare a roux (the same idea as for the Alfredo sauce in my previous post). Melt the butter in a sauce pan over low heat and add flour. Stir constantly with a whisk for a few minutes (the original recipe says 5-7, I say maybe 4-5). Slowly add in one cup of hot soup. Stir that up until smooth. Then add another 3 cups of the soup and stir again until smooth.
See how it's nice and thick and lumpy? Chuck that back into the slow cooker with the rest of the soup and give it a little stir. Add the Parmesan cheese, warm cream and salt and pepper. I had tasted the soup before adding the salt and pepper and I found that due to the Parmesan cheese the soup was salty enough for my liking so I didn't add any extra salt. Maybe a little more pepper instead.
Action shot! Anyway, once you have the last of the ingredients in, give it a taste and adjust any seasonings as you find necessary. Cover the soup up again and cook on low for another 30 minutes.
And there you have it. I served this with buns and garlic and herb butter. A perfect Soup Sunday if you ask me.

Take care folks,

xoxo

-A


Thursday, 3 January 2013

Chicken Penne Alfredo

This post will focus primarily on how to make a homemade alfredo sauce for those of you who may not know how. It's pretty simple once you get the hang of it and know how things are supposed to look and when to add certain ingredients. I tried to take pictures as I was going along which I will show you so you can get a visual however as I'm right handed it's hard to stir and take pictures with your left at the same time, so forgive me if the pictures are a little blurry. Also, you only need three main ingredients: butter, flour, and milk.

So, the way you want to start is by melting some butter in a medium sauce pan over medium heat. I would say about 1/4 cup. While that is melting get some flour (all purpose is fine) and have it at the ready. Once the butter is completely melted, start adding flour. We're making a roux! Add little bits of flour at a time and stir constantly as you don't want the flour to burn. Keep adding flour until your roux looks approximately like this...
Now you can start adding your milk/cream. I use milk as it's a little less fattening than using cream but cream also makes it that much more rich. So go for whatever you feel like. Pour in a little bit of milk (caution: the roux will get thick and stiff at first, keep stirring!!) and add enough milk until you can properly stir (I would say about a 1/2-3/4 cup of milk to start).
See how it's a little bit lumpy? That's what you're looking for at first.
Keep stirring and the sauce will start to get thick again, then add more milk.
These last two pictures were taken only a couple of minutes apart. I added more milk after the first picture was taken and kept stirring and the Alfredo sauce started to take shape.
Once you've added enough milk that your sauce is thick but still creamy you can start adding spices if you wish. If you're a Mennonite like me, basically add salt and pepper and you've got yourself a shmohntfat (somebody please correct me on my spelling of that word!). If you don't feel like being a Mennonite, add things like Parmesan Cheese, oregano, rosemary, Italian parsley etc (and obviously salt and pepper, that's a must).
This sauce is a little bit of a baby and needs attention basically at all times until you're up to this point. So if you feel up to it start making your pasta and whatever else you want, otherwise just wait until the sauce is done and keep it on low heat, remembering to stir periodically to check on the thickness. If it starts getting too thick just add a little bit more milk. If you feel it's too thin, just add a little grated Parmesan cheese, that works wonders for thickening up a sauce.
I cooked up a couple chicken breasts and I had some penne in my cupboard (I suppose you would "normally" see fettucine in this dish, but really, make whatever kind of pasta you want).
And there ya go. I would say this could definitely serve four people easily. I made it for my husband and I and we had leftovers for a few days.

So just for fair warning, I have been trying to post a bunch now in the off time between semesters however as of next week I may be posting even less than I usually do. I'm taking my last two courses for my B.A. (!!!!!!!!!!) so that will keep this girl pretty busy. I'll try and come back when I can and just know that I haven't forgotten about you, my faithful readers!

xoxo

-A


Thursday, 27 December 2012

Sushi Part Two

So this will be a quick one but I couldn't not post about the Sushi Extravaganza that my mom, my cousin-to-be and I had a few months ago. We made so much sushi and tempura and it was so unbelievably good that we actually couldn't even talk to each other about anything else. We kept saying "This is soooo good. No, really, this is sooo goooooddd!!" I had also never used raw fish in my own sushi before but I got some lovely sushi grade ahi tuna and salmon from Gimli Fish and it was top notch.
Here are the first batch of rolls we made. I don't remember what exactly was in each but we used combinations of tuna, salmon, mayo, avocado, carrots, cucumber, sprouts and probably some other stuff. No shell fish though because my mum is allergic! We made our own version of a Bakudan roll (because that's my favorite) which includes tuna, tempura crumbs and chili sauce and I think we also made an Alaska roll? (Jack, correct me if I'm wrong)
Look at that presentation courtesy of Jacquie. I must say I also have been enjoying pickled ginger more and more every time I have sushi (that's the pink stuff for those of you who are unfamiliar with it. The green stuff is wasabi, another must have for a sushi dinner).
All of our finished rolls. Not sure what us three women were thinking when we thought we could eat all of that by ourselves...
Some of our tempura-ed veggies happily frying away. This is about one eighth of the veggies that we made. We tempura-ed (yes, it's a verb!) carrots, cauliflower, mushrooms, green beans, asparagus, sweet potatoes, zucchini and peppers.
There's all of the tempura. Tempura sweet potatoes are my new favorite thing ever. EVER.
Our table setting. With all the accoutrements a sushi home-chef could want.
Also I should mention that my mom made ginger martinis using a homemade ginger simple syrup. Okay, I, ugh, I just can't. These are so amazing. SO amazing. Also rather powerful so they're good just for sipping. I'll get the recipe from my mother and post at a later date.
Alright, that's it for now. Up next, my recipe for a classic fettuccine alfredo. Something everyone should know how to make.

xoxo
-A

Chicken Saltimbocca

Have I mentioned before how much I adore Giada De Laurentiis? Because it's definitely worth mentioning again. She is one of my all time favorite chefs on the Food Network. Everything she makes is fairly easy but still somewhat challenging. You won't go completely out of your comfort zone cooking her recipes but she'll challenge and inspire you to try something new. At least that's what she does for me. I printed this recipe out ages ago and finally decided to try it. Really, it's not that complicated, just something fun and new to try.

What you'll need:
6 chicken cutlets, pounded flat
salt and pepper
6 thin slices of prosciutto
1 box frozen chopped spinach, thawed
3 Tablespoons olive oil
1/4 cup grated Parmesan
1 can low-salt chicken broth (14 oz).*
2 Tablespoons fresh lemon juice

* One thing I learned from watching Giada on TV is to always use low-salt/low-sodium chicken broth, that way you can control the amount of salt that is in your dish. You can always add a little bit more salt, but you can't take it away.

Pound your chicken cutlets flat and once that's done, sprinkle each with salt and pepper on both sides and lay flat. Place one slice of prosciutto on top of each piece of chicken.
Squeeze your spinach dry (or as dry as you can get it, it will still be moist either way). Place the spinach in a small bowl and season with salt and pepper then toss with 1 Tablespoon of olive oil until well coated.
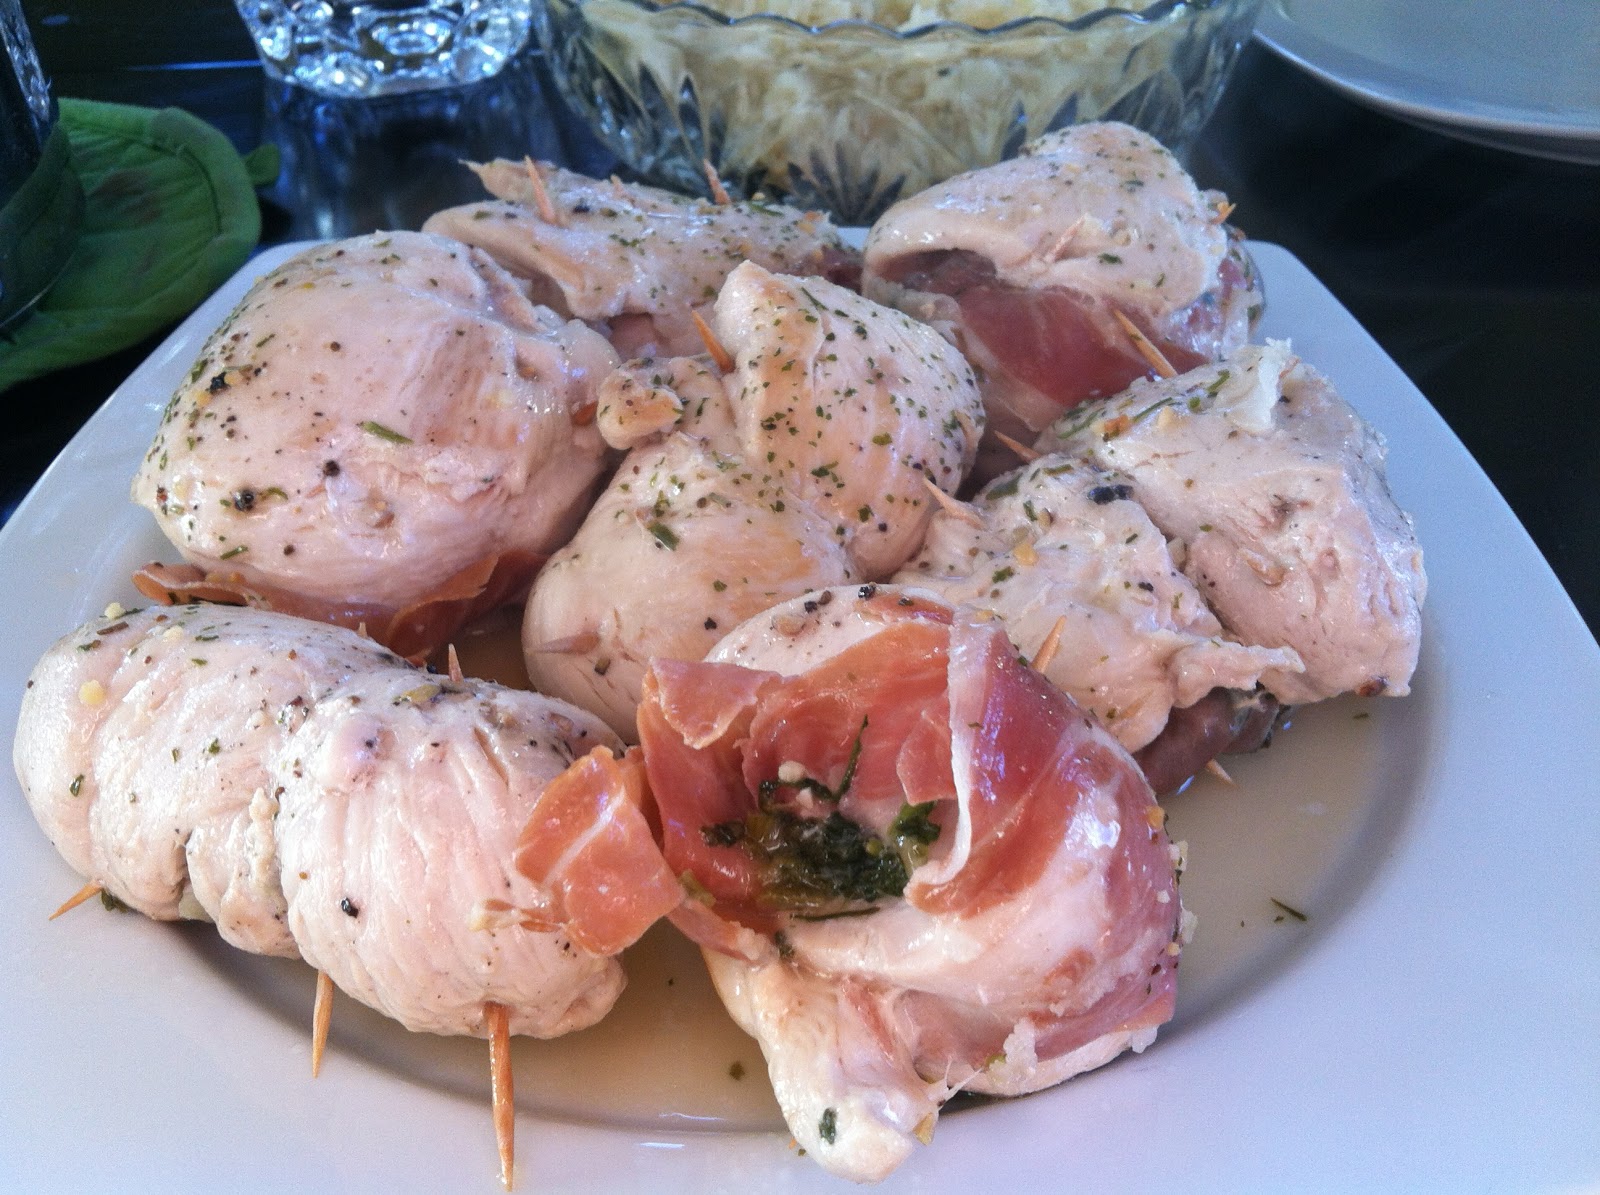
Spread the spinach in an even layer over the prosciutto. Once that's done, sprinkle each chicken cutlet with Parmesan. Next, you'll need to roll up the chicken cutlets into jelly-roll looking rolls. This is why it's important to have the chicken as thin as possible. Roll up the chicken cutlets and secure with toothpicks. Don't be afraid to use three or four toothpicks in each. I had to use several toothpicks in each as no chicken cutlet will roll up perfectly.
While you are rolling up the chicken, heat the remaining 2 Tablespoons of olive oil in a skillet (make sure to use one that has a matching lid).
See what I mean about using a lot of toothpicks? Yeah, don't be shy.
Carefully cook each chicken bundle until golden brown, about 2 minutes on each side. You don't want to cook the chicken all the way through just yet. Once the chicken has a nice golden brown colour on each side, add the chicken broth and lemon juice and carefully scrape the browned bits off of the bottom of the pan. Bring the liquid to a boil and then reduce the heat to medium. Cover the pan and simmer until the chicken is cooked through, about 8 to 10 mins. Once the chicken is cooked through, transfer to a plate and drizzle some of the liquid over top.
Obviously I don't need to tell you this, but make sure you take the toothpicks out before you eat them! No one wants a toothpick stabbed in the roof of their mouth.
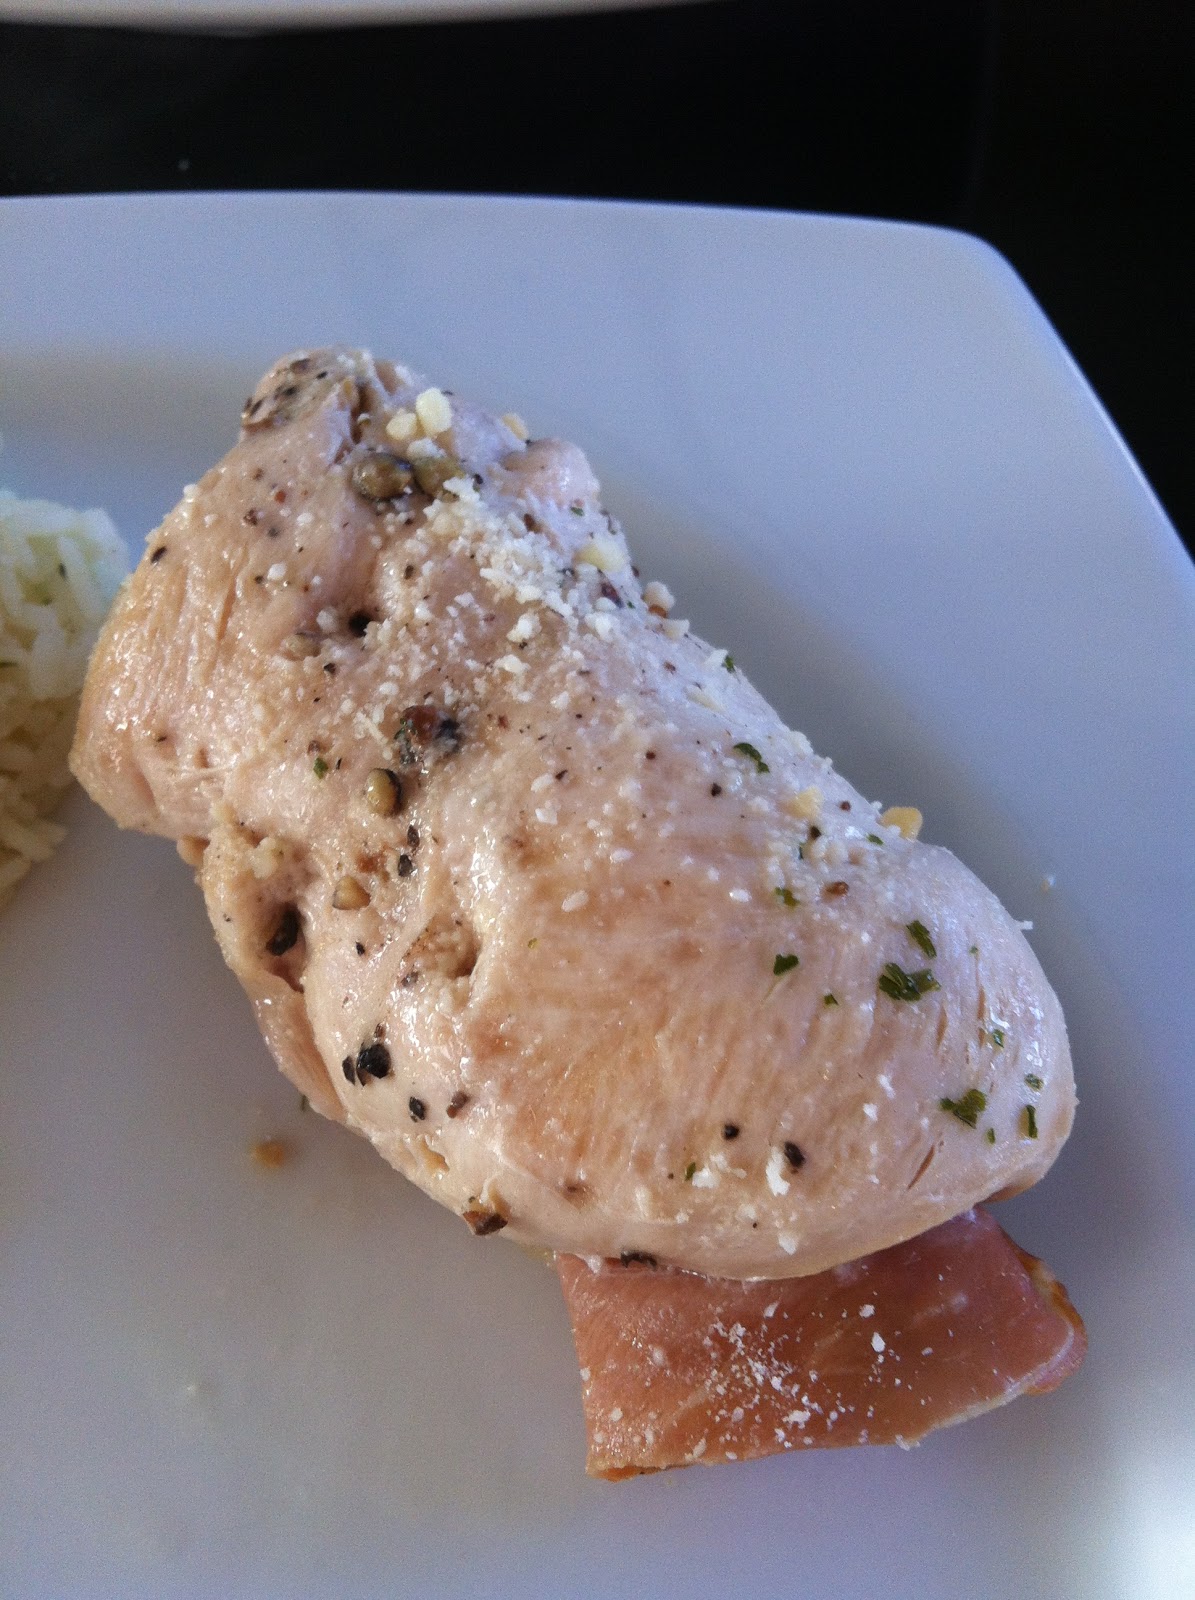
Eat it like this. Toothpick free and a little bit more Parmesan sprinkled on top. This dish would be one that is sure to impress company! Good luck, my friends.

Until next time,

xoxo
_A

Saturday, 22 December 2012

Football Feast: Dessert Edition

Alright, so my posts got a little mixed up when I tried to edit one I had created earlier on. Sorry for any confusion everybody! Here is what my next post should have been, the final part of my Football Feast Mini Series...

Everyone loves cookie dough. Am I right? Loves it. The only problem - raw eggs. It's fun to munch on here and there while baking a lovely batch of cookies but more than a lot of raw cookie dough is setting yourself for salmonella! And nobody loves salmonella. Why am I going on and on about raw eggs and salmonella, you ask? Because of the following recipe: Brownie Cookie Dough Sandwiches. These babies are amazing, and the "cookie dough" is egg free! This is another recipe I found off of Pinterest, here ya go. Now you don't have to go looking for the original recipe yourself (which I followed exactly, so I won't post the recipe myself this time).


I baked the brownie cookies in the morning and did the filling later when I was ready to assemble. They're very filling and VERY sweet but oh boy are they good. Seriously, do yourself a favour and make these. And the filling in the middle really does have the taste and texture of cookie dough. It's amazing. I wouldn't make cookies out of that alone, however.

Aaaaaand, just for fun and as an homage to my Grandma Annie, I made Cherry Chip Cupcakes...
My grandma made Cherry Chip cupcakes for us all the time when we were kids. Something so delicious is also very simple, all you need is a box of Cherry Chip cake mix, muffin tins and paper muffin cups. I made the icing myself using butter, milk and powdered sugar with a little bit of red food colouring mixed in at the end to make the icing pink. And that my friends, is the end of this particular series.

Now that it's Christmas holidays I hope to be doing a lot more blogging! I'm wwaaaaaayyyy behind - the football feast food was all made in September, yes, I'm that behind! Stay tuned!

xoxo
-A


Thursday, 6 December 2012

Penne Rosa and Mini Turkey Meatballs

These days, my husband and I hardly eat ground beef anymore. Since discovering ground turkey we substitute that in almost everything. I find that because of the mild flavor of the turkey I am able to spice it up in so many different ways. Ground beef isn't as versatile in my opinion because of the distinct flavor it has on it's own. Don't get me wrong, I still love the occasional beef burger, I just prefer turkey nowadays.
Anyway, this recipe really doesn't have anything to do with beef. I just had to have a little rant, I guess. I found this recipe on Pinterest (my new obsession) and the original actually uses shrimp. I love shrimp but didn't have any in the house and since we rarely eat it anyway I didn't want to go buy some. So, I decided I would make cute, little turkey meatballs instead!

So here's the original recipe for the Penne Rosa: http://backtoherroots.com/2012/03/20/penne-rosa-with-shrimp/

And here's what you'll need for the turkey meatballs:

1 pound ground turkey
1/2 cup panko bread crumbs (or whatever you prefer)
1 egg (to act as a binder)
Spices (oregano, salt, pepper, Italian parsley, garlic) approx 1 tsp each

I've been getting better at writing down the recipes that I make up on my own so when I finally get around to blogging about it I actually know exactly what I put in it! Thanks for being patient with my non-quantaties, my friends.

I started making my meatballs first before I started any of the pasta. The pasta dish itself only takes about 15-20 minutes so I wanted to make sure that the meatballs were done first so I could just throw them in and serve as soon as the pasta element was complete.

Mix all of the ingredients for turkey together in a bowl until nicely combined. Once that's done you can start rolling your meatballs. Have a heated pan with a little bit of olive oil ready to go and start dropping your meatballs onto the pan. I did mine in several batches, just so the pan wouldn't be too full and unmanageable. Cook them through all the way because they won't have a chance to do more than heat up once in the pasta.

Once these little guys were chilling out on the counter, I started making the pasta. So get your pot of water boiling for your penne, and in another pan get your garlic and red pepper flakes going. I didn't use mushrooms in this recipe because my hubster doesn't like them. I just don't get it. Anyway, once your garlic and red pepper flakes have cooked for a bit, add the tomatoes, salt and pepper (and mushrooms, if using). Cook that for a second, turn up the heat and then add the turkey meatballs (or shrimp if you're following the original recipe). Cook that for another second (actually about two minutes) and then add your spinach and put the lid on so the spinach will wilt.
Spinach before wilting...
Spinach after wilting! Also with the pasta sauce and Greek yogurt mixed in. Once that's all mixed together, throw in the pasta and there you have it. A ridiculously easy and delicious weeknight pasta dish.
Now that I'm looking at this I seriously want to make this again. Yep, executive decision, it's going on the meal plan for next week.

Much love to you all,

-A


Tuesday, 4 December 2012

Football Feast Part 2

Sorry everybody, I know it's been a while since my last post! I'm in the middle of studying for my LAST psychology exam (well, for my B.A. that is...) so I've been rather busy. But since I have the day off from work today I figured I would take a little study break and continue with my Football Feast posts. As promised, what follows is the recipes for Chicken Parmesan Bites and Mediterranean Won Ton Cups...

First, the Chicken Parmesan Bites. Well, more accurately, mine would be called Turkey Parmesan Bites. Pretty much the same thing. Anyway, these were so cute in delicious, they had the honor of making it to my favorite recipes binder. Here's the link to the original recipe. And here's my version...

Ingredients:
1 tablespoon olive oil
1/2 cup chopped shallots (I just used a regular yellow onion, minced really small)
2 garlic cloves, minced
1 pound ground turkey
1 1/4 cups panko
1 teaspoon dried oregano
1 teaspoon dried basil
1 teaspoon salt
16 small fresh mozzarella balls (I used Boccocini and I actually got 30 out of this recipe. I'm pretty sure I didn't double it. Whatever, just use as many mozza balls as it takes to get rid of the meat mixture).
1/2 cup marinara sauce (I used my homemade sauce)

Directions:
Preheat oven to 350F. Heat olive oil in a medium skillet and saute onions (shallots) until soft. Add garlic and saute for one more minute.
Mix the shallot/garlic mixture with the ground turkey (or chicken, if using), 1/4 cup panko, oregano, basil, and salt in a large bowl. Carefully wrap one mozzarella ball completely with the turkey mixture, then roll in the remaining panko crumbs. Continue until turkey mixture is gone, placing balls on a lightly greased baking pan. Once all the balls are complete, place in oven and bake for about 20 mins or until turkey is cooked through. When they come out of the oven, place a toothpick in each ball and serve with marina sauce.

Ta da!! Frickin' adorable. And addictive.

Next up, Mediterranean Won Ton Cups.

I had made these for the first time a few days prior for a dinner party with some friends. I had prepped the mixture ahead of time and left it in the fridge at work so when it came time to assemble, the mixture was cool and a little difficult to work with. When I made these for the second time, I left the cream cheese at room temperature and it was much easier to work with. This recipe comes from Kraft Canada and though I am a little bit of a recipe snob these days, this one actually was pretty good. Also, I couldn't find the cream cheese this recipe asked for so I used a mixture of two different kinds. So here goes...

Ingredients:
24 won ton wrappers
1/2 of a 250g tub of roasted red pepper cream cheese and 1/2 of a 250g tub of herb and garlic cream cheese.
1/4 cup finely chopped roasted red peppers
1 stalk celery, finely chopped
2 green onions, finely chopped
2 tablespoons Miracle Whip

Directions:
Preheat oven to 350F. Place one won ton wrapper in each cup of a 24 cup mini muffin tin that has been lightly greased. Press the won ton wrapper gently into edges of the cup with the ends sticking out over top. Bake for 5 minutes. While those are baking, mix the remaining ingredients together in a small bowl. Take won ton cups out of the oven and place about 1 tablespoon of the cream cheese mixture into each cup. Bake these for 12 to 14 minutes or until filling is heated through and the edges of the won ton are golden brown.


Bite size snacks are some of my favorite things in the world.

Next up, the dessert that I made to go along with all of this deliciousness. Stay tuned....

xoxo

-A